Tuesday, March 19, 2013

Shelves in the Closet: What a Happy Thought Indeed!

For any other Jane Austen nerds out there, you may recognize the title of this blog post as a quote from Pride and Prejudice. Elizabeth Bennett expressed this statement dripping with sarcasm at Mr. Collin's excitement over shelves in the closet. She would probably utter the same statement to me if she had been in my home the past week as hubby and I installed shelves in one of our closet.

We are blessed to have a lot of closets in our home, especially considering it was built in 1955 which was an era that they did not put a lot of closets in homes. We actually have two closets in each of the three bedrooms. This is especially wonderful because I have 15 boxes of children's books that were given to me by my aunt when I graduated from college. They are for my classroom, but I do not have room to store them  at school. The pile of boxes not only made it difficult to find the books I wanted to take to school, but I also hated the fact that our guest bedroom was cluttered by a huge pile of boxes. Plus, why have a pile of boxes in the room when you have a closet like this! Empty space crying out to be used efficiently. There is a second closet in this room that can hold a few coats and have plenty of room for guest's clothes and suitcases when they come to stay. So why not make better use of this closet?

We started by measuring the closet and deciding how many shelves I wanted. I decided I wanted six shelves and we would put them 10 inches apart. We multiplied the length of the shelves (which was the same as the width of the closet) by six to figure out how many boards we would need. We went with 1x12 boards in 8 ft long sections. We ended up needing 3 boards to make our shelves. Then we bought several 1x2 boards for the braces on the shelves and on the walls to hold them in place. We originally bought more wood than we needed, but we were able to return them after we finished the project.


My hubby cut the shelves and braces using his circular saw and chop saw. He loves any project that lets him use his power tools. Then I helped him put the braces on the shelves using the nail gun! Yes, I have discovered the love of a nail gun. I'm pretty sure that I will steal the nail gun in any future projects!


Once the shelves were finished, hubby installed the braces in the closet that the shelves will sit on. Then we put the shelves in to let them acclimatize to the space before we painted them and the closet. After they had acclimatized for several days, it was time to paint the shelves and the inside of the closet. We had painted the closet when we moved in, but there was a gross looking section where the old shelves had been attached to the wall and the plaster had been damaged by pulling the old shelves off the wall. So after hubby patched the wall and sanded, it was time to paint!


I totally took advantage of a glorious spring day to paint the shelves outside

After painting the shelves and the closet, a couple of the shelves that had been a super tight fit no longer would go in. Since the hubby was at work and I wanted to get to work on putting books away, I attempted chopping a sliver off of the shelves by myself. I'm not gonna lie, the chop saw is a bit scary, but I did it and it was awesome!
The finished shelves!
So after a day of alphabetizing and putting away hundreds of children's books, here is what the closet looks like now:

Isn't it beautiful! And I can easily find any of the books I want for school and the guest room can be reclaimed! So yes, Elizabeth Bennett: What a happy thing to have shelves in this closet!

What spaces in your home could use reclaiming? I'd love to know what you are working on and what you think of my new book closet!

Have an inspired day!

Kelsey Noll


Sunday, March 17, 2013

The Home of the Nolls

On July 31, 2012 we closed on our very first home. It was so exciting to own a home! We had been looking for many months and put in multiple offers on different homes. I am so glad that we didn't get any of those (even though that is not how I felt at the time). I am so in love with our home and fall in love with it more and more every day, especially as we put our own stamp on it. As I have not posted anything about our home on my blog, I thought I would take an opportunity to share pictures of the home as it was when we signed the papers. That way, when I post about projects we are doing, any readers (and myself) will have a good point of reference as to where we started our journey.

Without further ado, I present:

The Home of the Nolls!

We were so excited to unlock our very own house for the first time! (Excuse my hubby's finger in the picture). We have a beautiful front yard with mature landscaping and lovely (note my sarcasm) boxwood hedges. I dislike boxwood hedges, but for now they can stay.


 The first view is our living room from the front door. The opening you see is into the dining room. The second view is from the hallway leading back to the bedrooms. I absolutely love the huge windows in the front of the house. I also absolutely loved the light fixture left by the previous owners (no sarcasm here). It is a beautiful chandelier style with crystal pendants. Hubby says I can keep it as long as we can spray paint it bronze since it is currently copper and doesn't match the rest of our decor.

Moving on: Next up is the Dining Room

In the dining room is yet another of these beautiful pendants. To the left of the dining room is the door to the kitchen and to the right is a door into our family room. Throughout most of the house, there are wood floors that are in pretty good condition. We do plan to refinish them at some point in the future, but our money did not allow for it when we first moved in.


Next we will head into the Family Room. Now I must prepare you, when we first moved in, this room was pretty hideous. It was the first room that we dealt with:

Look at that lovely carpet! And wood paneling! And light fixtures! EWWW! It was so full of brown that you could not even appreciate the beautiful brick on the fireplace and the wall leading back into the dining room. Even the blinds were copper... ick! When I say that this was the first room we dealt with, what I mean is that the night we closed on the house, we went in and ripped up that delightful shag carpet. Instantly better! The following weekend, we painted the wood paneling white.


Next up on our tour is The Kitchen:

Can you say scrumptious 50s?

Look at that tile and floor! And notice the gap of the missing cabinets in the corner shown in the photo on the left?

We did really like the amount of cabinets. We also liked that there was a pantry in the kitchen. (We didn't have a pantry in the town home we had been renting.) We also liked that the cabinets were real oak. They don't make them like this anymore! More on what we have done to the kitchen later. For now, just take in that beautiful linoleum and bumble bee tile!

Next up: The Hallway and Guest Bathroom

There it is: our hallway. Lovely right? Right! It leads to our three bedrooms and guest bathroom. It also is home to a wonderfully oversized closet. Did I ever tell you that I love closets? Well I do and we have a lot in this house! Okay, enough about the hallway.

Our guest bathroom is also covered in 50s yellow and teal tile. Lovely color choices, but it is a nice size with a great built in cabinet.


Now on to the bedrooms:

They pretty much all look the same so I wont bore you with pictures that you look so similar you can't even tell them apart. The master and 3rd bedroom have double closets with sliding doors while the Guest bedroom has double closets with hinged doors. The master is the largest and has an en suite bathroom while the 3rd bedroom is the smallest and is my craft room, but pulls double duty as a guest room when needed.

Any finally, The Master Bath which is also known as the smallest bathroom I have ever had: It also has 50s tile work. It does have a shower to the left which is basically a box covered in the same tile work. It works for us although we do plan to update it. At least it won't cost as much money to update this bathroom!

Last but not least, I will leave you with a shot of our beautiful backyard. We also have a shed and a laundry room, but as they are just cinder block rooms, they don't really need pictures at this point in time.

That's our home! I can't wait to share our house projects with you as we finish them!

Love,

Kelsey Noll


Wednesday, February 27, 2013

DIY Painted Lamps

I am absolutely loving decorating my very own home. I love owning our home and being able to make it anything we want. Every room is a blank canvas waiting to be transformed. While I have several projects to blog about (the biggest one being our Kitchen renovation), I am excited to share my very own lamps made from bottles!

I first saw these paint swirl vases via Centsational Girl and fell in love with the idea. I knew I wanted to do something similar for our Beach themed Guest Bedroom.

I took some bottles (Roses Mix bottles) because I liked their shape. I washed the bottles out and peeled off the labels. Of course, that awful sticky gunk was left. After doing a little bit of Google research, I came across the tip that peanut butter would remove it without scrubbing. So I slathered a thin layer of peanut butter on the sticky areas, waited ten minutes, and then wiped it off. Perfecto!
I picked out some acrylic paint colors that I liked to match our theme. To paint the vases, simply drop some of each color into the bottle. Slowly turn the vase and let the paint work its way around the inside of the vase. I found that Martha Stewart craft paint is a bit too thick for my liking. I liked Craft Smart and Americana better as they swirled around easier. But, with a little coaxing and some gravity, my bottles were coated. Turn the bottles upside down and let the extra paint drain out.

I loved the finished products! For the first bottle I used Martha Stewart "Pool" and "Pond" and Craft Smart "Turquoise". For the second bottle (my favorite), I used Craft Smart "Turquoise", Martha Stewart "Blue Calico", and Americana "Bleached Sand."

Here are the finished bottles:
Bottle 1
Bottle 2 (My favorite!)
 I was going to leave them at that and just use them as decoration in the guest bedroom. I had a completely  different idea for what kind of lamps I wanted to use, but as I was looking at my finished bottles I recalled a DIY lamp project that I had stumbled across on this blog: The Happy Tulip. I didn't actually pin it because while it was an interesting concept, I did not think I would ever need to make my own lamps... Oh how wrong I was!


I decided that these would look mighty fabulous as lamps in our beach themed room. So off the hubby and I went to Lowes where we found light kits ($8 a piece) and shades ($6 a piece) and some glass drill bits. Then we went to work. Hubby did the actual drilling while I watched a prayed that he would not destroy my beautiful painted bottles. In the end, success! The light kit is really easy to install as the instructions are on the package. The hardest part was threading the cord through the vase. (You could just have the cord come out the bottom of the light kit and skip the drilling step, but we decided that aesthetically, we liked the cord going through the bottle better.


Once we plugged both bottles in  and the lights worked (FIRST TIME! WOOHOO!), I went to work on the shades. I had the idea that I wanted to paint words on the shades. I decided on the paint color I wanted. I went with a very neutral color as I didn't want it to draw attention away from the bottles, but I wanted it to be seen. I took my paint, stencils, paint brush, and tape and sat outside in our few hours of sunshine. (It had been raining for days.)


I decided that I wanted to paint "Sea" on one shade and "Shore" on the other. I took each stencil, one at a time, taped it into place and painted. They turned out so great! Especially once I added the shades on top of the bottle! I can't wait to get the room set up enough so they have a home. 


And that is how I made my own lamps. I love when I start with a project I found on Pinterest and it becomes a completely different (and completely amazing) finished product! 

What do you think of my lamps? What colors do you think would look good together? 


Have an Inspired Day!

Kelsey Noll

Wednesday, July 18, 2012

Boy Scout Birthday Bash

This past weekend I threw a joint birthday party for my hubby and his best friend. It was so much fun, especially considering hubby's best friend's wife is my close friend and she helped throw the Birthday Bash.

When we were discussing what we should theme the party, the idea came up to celebrate their birthdays by reminiscing on the days of their youth as Boy Scouts. I had a ton of fun searching through Pinterest and my own imagination to come up with ideas for the party. I spent the week before the party making the decorations.


First, I made the "Happy Birthday" banner by printing out the font I wanted from Microsoft Word. Then, I traced the letters onto cardboard and cut them out using my Exacto Knife. Next, I traced the letters onto outdoorsy themed scrapbook paper, cut them out, and mod podged them onto the cardboard letters. Finally, I punched holes through each letter and strung them together using twine. I think it turned out awesome (see bottom right picture) -->
Second, I made the "Boy Scout Camp" sign. I went around my town house and gathered up twigs. I broke them and laid them out to spell the words. Then, I simply glued the pieces of stick to the cardboard, punched holes in the cardboard and strung it on some twine. I made the "Camp" arrow the same way. Our townhome is on the corner and you can't actually see our front door from the parking lot, so I thought it was a cute way to point the way for our guests that had never been there before.Finally, the day of the party, my beloved hubby hung my tent entrance. We used white curtains that used to hang in our living room, but I shrunk them accidentally in the dryer. Since then we had bought new ones, but I had hung onto these knowing one day they would serve a purpose. Hubby draped them over sticks and hung the sticks using twine and hooks. He did a great job at fufilling my vision.


Also during the week, I planned out the menu for the food we would offer, and I made the tent that would be the centerpiece of the table. (See table picture below). I made the tent using twigs and twine and covering it with some fabric. I actually LOVE the way it turned out.

Throughout the week, I made my lists of things that had to get done and the grocery lists. Friday after work, my friend and I went to Sams to buy food and hung out at my house making all of the delicious treats and rocking out to some Disney music. Meanwhile, our two husbands hung out and played on their computers. We had so much fun making everything!

Starting from left to right on the table I will now explain the Boy Scout themed treats we made :)

1) S'more Bites:
Because S'mores are so messy, we decided to do a bite- size treat. All you have to do is melt some chocolate and crush some graham crackers. Then take a marshmallow (on a fork or toothpick) and dip it in the chocolate then into the graham crackers. Place it on a cookie sheet with wax paper. The chocolate hardens in just a few minutes. They were easy to make and our husbands loved them!

2) Acorns:
These are also really easy to make and very tasty. Unwrap the Hershey kisses and break pretzel rods into little bits and dump the mini nilla wafers in a bowl. I put the three ingredients into separate bowls. Then I put chocolate icing into ziploc bags. It turned out to be beneficial to make two icing bags because as the icing gets warm by using it, it stops holding together as well. Having two bags lets you keep one in the refrigerator so you can switch it out. Then just use the icing to attach the Hershey kisses to the mini nilla wafers and then add the pretzel bits to the top. That's it! These were a big hit!
Acorn Inspiration Here

3) Fire Cupcakes:
These are pretty straight forward. We made vanilla cupcakes. Then I colored 1/4 of the icing red and the rest green. We iced the cupcakes with the green. Then using a tip and the red icing, and put "flames" in the middle of the cupcake. Finally, break the pretzel rods into thirds and stick the ends into the flames. This was such a fun addition.
Cupcake Inspiration Here

4) Sliders and Mini Corndogs:
We decided to go with sliders rather than full sized burgers because it was more reminiscent of Boy Scout days. We used salt, pepper, and garlic salt to season the burgers. Then you just roll the patties to be about 2oz or 1/8 of a lb. Then you grill it for 6-8 min the day of and put it onto dinner rolls. The mini corndogs were pre-made frozen ones that you simply bake in the oven.
5) Pinewood Derby Cars:
These were also a lot of fun to make. We used a variety pack of mini candy bars. We used m&ms as the wheels, Spree as the steering wheel, and Honey Teddy Grahams as the drivers. Unwrap the candy bars, cut the spree in half, and cut the teddy grahams in half. Then use chocolate icing to glue it all together. The color coding turned out really cute!
Derby Car Inspiration Here


6) Edible Fire:
This is a brownie baked in a circle pan. When it was cool, I covered it with chocolate icing and then sprinkled crushed graham cracker over it. We used twix bars as the logs and red and orange m&ms as the coals. Finally, we used Fruit Roll-ups as the flames. The one that was my inspiration used tissue paper as the flames, but that wasn't edible so I came up with this idea. It turned out super cute.
Edible Fire Inspiration Here

We also served lemonade and sweet tea and allowed guests to bring their own beer.


I was soo happy with all of the food. Everybody loved it. The final decorations were a couple of Boy Scout themed activities. First, on top, I printed out different Boy Scout badges. I picked ones that represented the interests of our birthday boys. I set out safety pins, and had the guests pick a badge and wear it. Second, I printed out the Boy Scout Law which is the characteristics to be found in a Boy Scout. I set out sharpies and cards to have our guests write a note to the Birthday boys pointing out how they saw the traits of a Boy Scout in them.

Well, that was my Boy Scout Birthday Bash! I am so excited about how everything turned out and everybody seemed to really enjoy the food and decorations. This is my favorite party I have thrown and I had so much fun doing it!


Wednesday, July 11, 2012

Ch-Ch-Ch-Changes!

I am so excited about the things that God is doing in the life of the Nolls!

1. Earlier this year, I finally got a teaching job! I have been searching and praying for a teaching job since I graduated FSU in May 2010. (Well I've actually been praying about it since I was a child.) The first August after graduating, school started and I didn't have a job. I was devastated. It is probably the most I have questioned my life and my dreams and even the path that I thought God had put me on. I don't know how I would have made it through without my beloved husband. Throughout the next year, I worked two jobs at the same time (which was rough) while Austin finished up grad school. Finally, Austin graduated and got a job (yay!) Less than a month later, he got a raise (double yay!) He was now making enough that I could resign from my job (Sorry Dr. Currieo) and focus on looking for a teaching job. As I spent time at home, I discovered that I love being a stay at home wife and focusing on my husband and our home. Through it, we saw we could live comfortably on only Austin's salary. Austin told me that I didn't have to work unless I wanted to. I figured out through all of this that I really only wanted to work in a Christian school. As I stated at the beginning of this post, I got a teaching job for next school year. I am so excited about the school! It is a Christian school here in Tallahassee that is a hybrid program. The students are in school Mon-wed and then they are home schooled by their parents Thurs-Fri. The teachers send home lesson plans for the home school days. I absolutely love the set-up of the program. The school focuses on academic excellence, moral excellence, spiritual excellence, and leadership combined together for a God-centered, well-rounded education. I am an assistant teacher this year. I hope that I can show what I can do and hopefully get to have my own classroom next year. But for now, I am absolutely thrilled to be a part of this environment and so thankful to get back into the classroom.

2. The second exciting event is that Austin got another promotion! He started his new position on Monday. He is now in management. When talking about his new position, it is the position that he had been looking for when he was preparing to graduate grad school. At that point, either the companies weren't the right fit, or they required traveling for five days out of the week. As we did not want that in our lives, we moved away from that route. God saw fit to bring us back to the perfect job for Austin.

3. Finally, we are in the final stages of buying a house! We will be closing at the end of July. I could not be more excited about this house! It was built in 1950s, so it does need a little updating. I am even excited about that. It has a lot of charm and I can't wait to put my stamp on it through the decorating. I promise pictures when we close. I can't wait to move in. Although, I am not loving packing up our townhome. How did we get so much stuff into this place???

Whew! What a crazy whirlwind summer it has been, and it is not done yet! Praise the Lord for his faithfulness to us!

Tuesday, June 19, 2012

Freezer Meals Part 2


These freezer meals have been a life saver! I love just being able to grab something and dump it in the crockpot. It will be even better when we move into a new house and can have a second freezer to store them. You can see part 1 of my freezer meal adventure here. I labeled each bag with the recipe name and the instructions for cooking prior to filling the bags. I did 2 bags for each recipe. I promised to post the recipes that I used for my freezer meals so here they are: 


Recipes:

Teriyaki Chicken from Ring around the Rosies
Medium – Large bag of carrots
Red Onion into Large Chunks  2 large cans pineapple (undrained)
4 Garlic Cloves  8 Chicken Breasts  1 cup teriyaki sauce

Follow the directions above and split everything into two gallon freezer bags. Shake it up, seal, and put in the frezer.
Instructions for Bag: Add 1/4 cup terriyaki sauce to crock pot. Cook on low 8 hours or high 4 hours. Serve over hot rice. 

Healthy Mama BBQ Chicken from Mama and Baby Love
3 medium unpeeled  sweet potatoes, cut into 1/2 inch pieces, about 2 cups.
2 cups chopped onion.
2 tablespoon quick cooking tapioca (or flour, or some other thickening agent).
8 chicken breasts (4 per bag)
2 15-ounce can of tomato sauce.
4 tablespoons packed brown sugar
2 tablespoons Worcestershire sauce
2 tablespoon ground yellow mustard.
2 clove garlic, finely minced, about 2 tablespoons.
1 teaspoon salt

Divide everything into two, one gallon freezer bags, shake it up, seal, and put in the freezer.
Instructions for Bag: Cook on high for 4-6 hours or low 6-8 hours. 


Divine Chicken
8 chicken breasts
4 cups baby carrots
4 cups fresh broccoli (chopped)
2 onions
salt/pepper to taste
2 cartons of cream of chicken soup (add 1 each at cook time)
2 cup milk (add 1 each at cook time)

Split everything  into two containers. shake it up, seal, and put in the freezer.
Instructions for Bag: Add 1 cream of chicken soup and 1 cup of milk, cook on low 8 hours or high 4 hours

Beef Stew (My own recipe)
2 Packages Beef for stewing
6 bullion cubs (3 per bag)
Potatoes (chopped)
Baby carrots
2 packages onion soup mix (1 per bag)

Split everything into two bags. Shake it up, seal, and put in the freezer. 
Instructions for bag: Add 2 cups of brown gravy to crockpot. Cook on low 8 hours. Serve over hot rice.

Honey Brown Sugar Chicken (My own recipe)
8 chicken breast
½ cup brown sugar
2/3 cup honey
8 tbsp lemon juice
4 tbsp butter
4 tbsp olive oil

Split everything into two bags. Shake it up, seal, and put in the freezer. 
Instructions for bag: Cook on low 8 hours or high 4 hours

Taco Soup (My own recipe)
3 lbs ground beef (browned)
2 pkg taco seasoning
2 pkg ranch dressing mix
2 cans pinto beans
2 cans chili beans
2 cans tomato sauce
2 cans corn
Mrs. Dash seasoning
Natures seasoning
Minced dried onions

Split everything into two bags. Shake it up, seal, and put in the freezer. 
Instructions for bag: Add Mrs Dash, Natures seasoning and minced dried onion seasoning to crockpot. Cook on low for 8 hrs or high for 4 hrs.

Savory Vegetable Beef Soup from The Test Kitchen of Melissa Fallis
2 lbs Brown ground beef in pan as usual- once cool divide mixture between bags
2 whole carrots chopped per bag
3 Red Potatoes chopped per bag
1 can v8 split between bags
1 28oz can diced tomatoes SPLIT between bags
1 cup frozen green beans in each bag
1/2 tbsp Worcestershire per bag
1/2 cup Beef Broth per bag
1 tbsp Parsley per bag
1 tsp Basil per bag
1/2 tsp Thyme per bag
1/2 tsp salt per bag
1/2 tsp pepper per bag
1 tbsp Sugar per bag

Instructions for Bag: Add 1.5 cups of water and 15 oz Beef Broth. Cook on LOW 8 Hours.


Each recipe makes 2 bags and each bag gives me and my husband two dinners and at least one lunch. So from seven recipes we get 28 dinners. As I said in part 1, I only spend $95 on all the groceries for all 28 dinners (except honey, brown sugar, and Worcestershire sauce as I already had those) as well as an additional 4 lbs of hamburger meat. I split those into 1lb each and froze that as we use it in spaghetti, hamburger helper, and other recipes. 

So far we have really been enjoying having all these meals already prepared. 


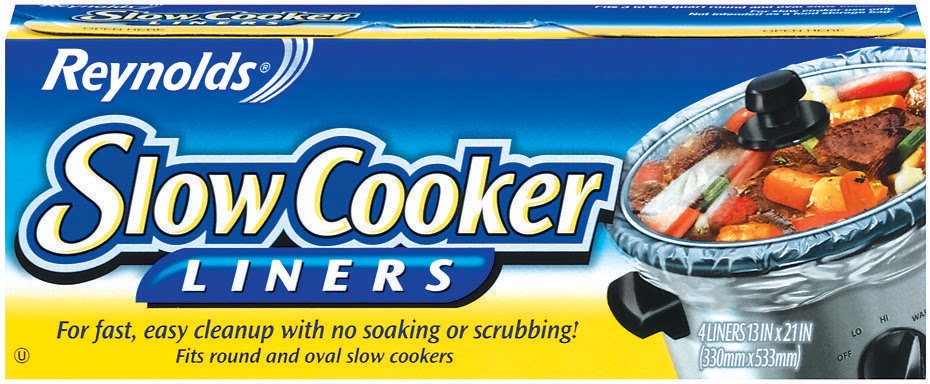
The other thing I have to add is that I love using the Reynolds slow cooker liners.They make clean up super fast. They have been tested and are perfectly safe for cooking food at high temperatures. These have a permanent place on my pantry shelf and are essential to this whole freezer meal idea working successfully (because as much as I love my crockpot, I HATE cleaning it). This saves so much time!


I hope if you use my recipes and blog about it you will give me credit as I have done for those whose recipes I used. 


As for this experience, I will definitely be doing freezer meals on a regular basis and look forward to finding new recipes to try out. 


Monday, June 18, 2012

Food Glorious Food! Freezer Meals Part 1

Just a picture of food to tantalize your senses!
For a couple of months I have been reading about this thing called: freezer meals. It was all over Pinterest. The idea is that you spend one day cooking/ assembling meals for a month, then you put them in your freezer. When you need it, all you have to do is pull it out of the freezer and put it into the refrigerator the night before (or the morning of depending on the meal) and cook it or heat it up. All of the instructions for what the meal needs to be finished are written on the packaging so you don't have to think at all. I loved this idea. Mostly because when it comes down to making dinner, I am either tired, lazy, or just don't have any creative ideas. We have been eating a lot of pasta and hamburger helper the past month or so. Plus the women that have done this all say that they save a lot of money doing meals this way. We live on a fairly tight budget, so I am all about saving some money in the grocery department.

Finally, I decided it was time to try it for myself. So on June 5, I went through my pinterest board and found all of the pins on freezer meals and followed them to the blogs of those that had written about this process. I read the pros and cons and the different variations on how to do these. Some did a lot of actually cooking on the prep day. They cooked all the meat and assembled everything. A couple of other bloggers said that they tried doing it that way but it was so exhausting and took all day. Instead, they just did all of the prep work and chose to do all meals that can be cooked in the crockpot. This meant almost no cooking during prep and all you have to do is thaw and then dump.

Now, I have to say that I absolutely LOVE my crockpot. It is probably my favorite appliance that is in my kitchen. I love being able to throw stuff in there in the morning and by the end of the day we have a delicious dinner. So I decided that the crockpot freezer meals were the way I needed to go.

So I went through my recipe box and through all of the recipes that those who had done freezer meals before me had assembled and pulled together seven recipes that I wanted to try for my first go around. (I will post all the recipes in the next post). I figured out what I had in my pantry and what I needed to buy. I made my grocery list and went shopping.

I spent $170 at the grocery store, but we had been out of a lot of staples. I went through my receipt and figured out that for everything that I bought for the freezer meals I only spent $95! Less than $100 for a months worth of food (which is what I ended up with...)?? I'll take it! Other than buying milk, I don't anticipate needing much else for the rest of the month! I organized everything so it was ready to go for prep day, which I was going to do the next day (June 6). I was a little tired from planning and shopping, plus I still had a lot to do around the house since we had just gotten back from a trip.

Next post I will:
1) Post the recipes I used (giving credit where credit is due of course)
2) Post pictures of my finished product