Tuesday, June 19, 2012

Freezer Meals Part 2


These freezer meals have been a life saver! I love just being able to grab something and dump it in the crockpot. It will be even better when we move into a new house and can have a second freezer to store them. You can see part 1 of my freezer meal adventure here. I labeled each bag with the recipe name and the instructions for cooking prior to filling the bags. I did 2 bags for each recipe. I promised to post the recipes that I used for my freezer meals so here they are: 


Recipes:

Teriyaki Chicken from Ring around the Rosies
Medium – Large bag of carrots
Red Onion into Large Chunks  2 large cans pineapple (undrained)
4 Garlic Cloves  8 Chicken Breasts  1 cup teriyaki sauce

Follow the directions above and split everything into two gallon freezer bags. Shake it up, seal, and put in the frezer.
Instructions for Bag: Add 1/4 cup terriyaki sauce to crock pot. Cook on low 8 hours or high 4 hours. Serve over hot rice. 

Healthy Mama BBQ Chicken from Mama and Baby Love
3 medium unpeeled  sweet potatoes, cut into 1/2 inch pieces, about 2 cups.
2 cups chopped onion.
2 tablespoon quick cooking tapioca (or flour, or some other thickening agent).
8 chicken breasts (4 per bag)
2 15-ounce can of tomato sauce.
4 tablespoons packed brown sugar
2 tablespoons Worcestershire sauce
2 tablespoon ground yellow mustard.
2 clove garlic, finely minced, about 2 tablespoons.
1 teaspoon salt

Divide everything into two, one gallon freezer bags, shake it up, seal, and put in the freezer.
Instructions for Bag: Cook on high for 4-6 hours or low 6-8 hours. 


Divine Chicken
8 chicken breasts
4 cups baby carrots
4 cups fresh broccoli (chopped)
2 onions
salt/pepper to taste
2 cartons of cream of chicken soup (add 1 each at cook time)
2 cup milk (add 1 each at cook time)

Split everything  into two containers. shake it up, seal, and put in the freezer.
Instructions for Bag: Add 1 cream of chicken soup and 1 cup of milk, cook on low 8 hours or high 4 hours

Beef Stew (My own recipe)
2 Packages Beef for stewing
6 bullion cubs (3 per bag)
Potatoes (chopped)
Baby carrots
2 packages onion soup mix (1 per bag)

Split everything into two bags. Shake it up, seal, and put in the freezer. 
Instructions for bag: Add 2 cups of brown gravy to crockpot. Cook on low 8 hours. Serve over hot rice.

Honey Brown Sugar Chicken (My own recipe)
8 chicken breast
½ cup brown sugar
2/3 cup honey
8 tbsp lemon juice
4 tbsp butter
4 tbsp olive oil

Split everything into two bags. Shake it up, seal, and put in the freezer. 
Instructions for bag: Cook on low 8 hours or high 4 hours

Taco Soup (My own recipe)
3 lbs ground beef (browned)
2 pkg taco seasoning
2 pkg ranch dressing mix
2 cans pinto beans
2 cans chili beans
2 cans tomato sauce
2 cans corn
Mrs. Dash seasoning
Natures seasoning
Minced dried onions

Split everything into two bags. Shake it up, seal, and put in the freezer. 
Instructions for bag: Add Mrs Dash, Natures seasoning and minced dried onion seasoning to crockpot. Cook on low for 8 hrs or high for 4 hrs.

Savory Vegetable Beef Soup from The Test Kitchen of Melissa Fallis
2 lbs Brown ground beef in pan as usual- once cool divide mixture between bags
2 whole carrots chopped per bag
3 Red Potatoes chopped per bag
1 can v8 split between bags
1 28oz can diced tomatoes SPLIT between bags
1 cup frozen green beans in each bag
1/2 tbsp Worcestershire per bag
1/2 cup Beef Broth per bag
1 tbsp Parsley per bag
1 tsp Basil per bag
1/2 tsp Thyme per bag
1/2 tsp salt per bag
1/2 tsp pepper per bag
1 tbsp Sugar per bag

Instructions for Bag: Add 1.5 cups of water and 15 oz Beef Broth. Cook on LOW 8 Hours.


Each recipe makes 2 bags and each bag gives me and my husband two dinners and at least one lunch. So from seven recipes we get 28 dinners. As I said in part 1, I only spend $95 on all the groceries for all 28 dinners (except honey, brown sugar, and Worcestershire sauce as I already had those) as well as an additional 4 lbs of hamburger meat. I split those into 1lb each and froze that as we use it in spaghetti, hamburger helper, and other recipes. 

So far we have really been enjoying having all these meals already prepared. 
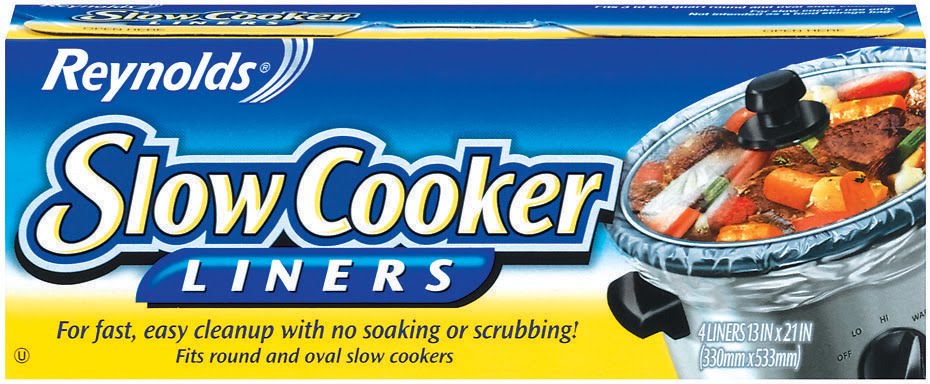


The other thing I have to add is that I love using the Reynolds slow cooker liners.They make clean up super fast. They have been tested and are perfectly safe for cooking food at high temperatures. These have a permanent place on my pantry shelf and are essential to this whole freezer meal idea working successfully (because as much as I love my crockpot, I HATE cleaning it). This saves so much time!


I hope if you use my recipes and blog about it you will give me credit as I have done for those whose recipes I used. 


As for this experience, I will definitely be doing freezer meals on a regular basis and look forward to finding new recipes to try out. 


Monday, June 18, 2012

Food Glorious Food! Freezer Meals Part 1

Just a picture of food to tantalize your senses!
For a couple of months I have been reading about this thing called: freezer meals. It was all over Pinterest. The idea is that you spend one day cooking/ assembling meals for a month, then you put them in your freezer. When you need it, all you have to do is pull it out of the freezer and put it into the refrigerator the night before (or the morning of depending on the meal) and cook it or heat it up. All of the instructions for what the meal needs to be finished are written on the packaging so you don't have to think at all. I loved this idea. Mostly because when it comes down to making dinner, I am either tired, lazy, or just don't have any creative ideas. We have been eating a lot of pasta and hamburger helper the past month or so. Plus the women that have done this all say that they save a lot of money doing meals this way. We live on a fairly tight budget, so I am all about saving some money in the grocery department.

Finally, I decided it was time to try it for myself. So on June 5, I went through my pinterest board and found all of the pins on freezer meals and followed them to the blogs of those that had written about this process. I read the pros and cons and the different variations on how to do these. Some did a lot of actually cooking on the prep day. They cooked all the meat and assembled everything. A couple of other bloggers said that they tried doing it that way but it was so exhausting and took all day. Instead, they just did all of the prep work and chose to do all meals that can be cooked in the crockpot. This meant almost no cooking during prep and all you have to do is thaw and then dump.

Now, I have to say that I absolutely LOVE my crockpot. It is probably my favorite appliance that is in my kitchen. I love being able to throw stuff in there in the morning and by the end of the day we have a delicious dinner. So I decided that the crockpot freezer meals were the way I needed to go.

So I went through my recipe box and through all of the recipes that those who had done freezer meals before me had assembled and pulled together seven recipes that I wanted to try for my first go around. (I will post all the recipes in the next post). I figured out what I had in my pantry and what I needed to buy. I made my grocery list and went shopping.

I spent $170 at the grocery store, but we had been out of a lot of staples. I went through my receipt and figured out that for everything that I bought for the freezer meals I only spent $95! Less than $100 for a months worth of food (which is what I ended up with...)?? I'll take it! Other than buying milk, I don't anticipate needing much else for the rest of the month! I organized everything so it was ready to go for prep day, which I was going to do the next day (June 6). I was a little tired from planning and shopping, plus I still had a lot to do around the house since we had just gotten back from a trip.

Next post I will:
1) Post the recipes I used (giving credit where credit is due of course)
2) Post pictures of my finished product

Tuesday, May 29, 2012

Crafty Wreath Goodness


I love being crafty! I have been having so much fun lately making some of the crafts that I have pinned on pinterest or just crafts that I have the idea for all by myself. I love working with my hands and creating something. 

This post came from an idea off of pinterest- A rag wreath. Here is a blog with a great tutorial: Halloween Rag Wreath  I wanted to an FSU wreath, but not one that was specifically football, so I could hang it throughout the year. Although, I plan to continue making wreaths so I can have one for different holidays. 

First, I picked out three fabrics. I bought a yard and a half of each (I only got a yard of the FSU one) and I have a lot left over. I probably have enough to make a second wreath if I want to as a gift or something :). My friend that I made this with also bought a polka dot fabric for an accent that we both used in our wreaths. That just sent it over the top to awesome in my book! (For those that dont know, I am obsessed with polka dots!) I also bought a wreath form from Hobby Lobby that you can see in a picture below. They have four different sizes so I bought the 12 inch one for only $2.47. I also bought wooden letters for the F-S-U. 

After you have your fabric, you need to cut them into strips. I cut mine into 7" long and 1" wide strips. Remember that they are supposed to look rag like so if they aren't cut perfectly it is okay. Some people just cut slits at the intervals they want and then rip the fabric, but I am too much of a perfectionist to go that far. (You can see the polka dot fabric on the left!)


This is when I was done tying strips
Then you just start tying. The wreath form has four tiers, but I only tied my strips on three of them. It made it really full, but not overly so. It works best if you keep the print side facing up when you thread it on the wire. I also double-knotted my fabric because I did not want it to come undo at some point. As far as pattern, I basically just alternated between the garnet and gold and threw in the FSU and polka dot fabrics throughout. 
When I finished tying the strips, I added a length of ribbon by tying to the back and making a loop.


After I finished tying all of the strips and adding the ribbon, it was time to do the letters. I had gotten packs of letter from Hobby Lobby that came with two of each letter in a pack for $1.47 each. To decorate the letters I simply used a high quality glue stick and sprinkle the glitter on, tapping the excess back into the jar. You could also use spray adhesive. Another option would be to simply paint the letters, but I like the pizzazz of a little glitter!


Once the letters were dry, I simply hot glued them to the wreath. And voila! An FSU rag wreath. 


I had a lot of fun making this with my friend while we listened to country music and then watched Mama Mia. It is a great craft to do with a friend, or a good movie, or in my case both!


Now I simply can't wait for football season! 


Oh and we just got some awesome stadium chairs for this season so now we are fully prepped for some FSU football!


Happy tying!

Friday, May 18, 2012

A Cute Way to Save Cards

My family has always made fun of me for saving the cards I get for my birthday or other events. I always said that I would figure out someway to preserve those cards. I found an idea via Pinterest (my addiction)! I found it at Something Turquoise. 

First, gather your supplies. You will need two pieces of cardboard, and the paper you have chosen for both the front and the back of your album. You will need paper for the outside and the inside. You will also need ribbon to tie your album together. You will also need brads to attach the ribbon, glue, a ring, and any additional decorations for your album. 

I gathered all our wedding cards together. I sorted them out by size and found the largest card. I used that as my sizing guide to cut the cardboard and paper. I added 1/4 inch to the measurements of the lengths and widths in order to ensure that the card doesn't stick out from underneath. Cut two pieces of cardboard to size (one for the front, one for the back). Pick out the paper, or combination of paper, and cut to size. Attach the paper you picked for the front to the cardboard (for the outside and inside of your front cover). Attach the paper that you picked for the back cover- only the outside, do not attach the inside yet as you will need it to cover the brads so they don't show.


Measure out how much ribbon you will need to tie around your album. If it is one that you want to add cards to as the years go by then add a couple extra inches. find the middle of the ribbon and the middle of the back piece of cardboard. Use an exacto knife or some other knife to create a hole through the ribbon and cardboard. I put three brads in my album but others choose to only do two. Attach the ribbon. Now you can attach the paper to the inside back cover to hide the brads. 

The final step for creating the cover for your album is to decorate the front if you so choose. I simply chose to use gold stickers for "Austin and Kelsey" and the date of our wedding and a black calligraphy pen to write "Our Wedding Cards".


Punch holes through all of your cards and arrange them on the ring in whichever order you choose. Add the front and back covers and close the ring. Tie the ribbon and step back to admire your beautiful album of cards!


Wednesday, February 15, 2012

Valentines Day = Lots of Chocolate!

This year I had so much fun with Valentines Day!

It started with thinking up ideas for what to make Austin to take in for his work. They do parties for every holiday. The past couple of parties they have had, I have sent in some sort of treat. Now for the past couple of weeks, his coworkers have been asking him what I was going to send in with him for Valentines Day.

We decided we wanted him to take in a platter of chocolate with chocolate boxes (idea came from Cake Boss) with homemade chocolate hearts, roses, and flowers and chocolate dipped strawberries. It was an adventure, but in the end we managed to make two different types of chocolate boxes to put on the platter. It turned out awesome!

(Huge platter for Austin's work)

(Single box)

We actually made extra boxes. One we gave to Austin's best friend and his wife. One we gave to my best friend. And finally one we put on top of a cake (homemade by me) and took it to our fellowship group.

(Single box on top of a homemade yellow butter cake with homemade buttercream icing)

The cake turned out wonderfully and I am pretty happy with the decorating. I am slowly improving in my cake decorating skills. All in all it was a lot of fun and a LOT of chocolate!
(We used 2- 2lb bags of melting chocolate and 1- 2.5 lb bag of melting vanilla)

I would love to hear what you think!

Friday, December 9, 2011

Pinterest = Pinspiration

I love crafting and Pinterest feeds that love... love, obsession, whatever you would like to call it. Pinterest is a site where I can find ideas for anything I wish to make. The great thing about my new situation in life- that of a housewife- is that I actually have time to do the crafts that I find on Pinterest. Here are some of my recent Pinterest conquests:

1) Ornament Wreath

This was the first craft that I did after discovering Pinterest. The directions I followed can be found HERE. *There are pictures along with the instructions*

First, buy pretty ornaments from the Dollar Tree, Dollar General, or any other store that sells packages of ornaments for $1- $3. Also find a wire hanger. (Hopefully you had not recently thrown them all away like I had). Untwist the hanger and shape it into a circle. Hot glue the ornament tops so they do not pop off. Arrange the ornament by sliding them onto the hanger making sure to vary the sizes so there are fewer gaps. The final step in the instructions that I followed is to twist the ends of the hanger back together and attach a ribbon to the wreath to hand. I added one final step to my wreath. I bought a gold garland from Michaels, cut pieces from it, and glued it in between ornaments on the wreath.

Here is my finished product:

2) Glitter ornaments with no mess.


Gather your supplies: Floor wax- I used Pledge with Future Shine, clear glass ornaments found at Michaels or Hobby Lobby, fine glitter, and a funnel.

Take the tops off the ornaments. Pour a little bit of floor wax in an ornament. Gently swirl it in the ornament so that the entire inside is coated. Do not shake it or there will be bubbles. Pour the leftover liquid back into the bottle which will coat the neck of the ornament. Pour the glitter into the ornament using the funnel. Swish the glitter around to coat the inside. Put your thumb on the top and shake the ornament to ensure that the neck is coated. Pour the leftover glitter back into the bottle. Put the top back on. I added gold letter stickers to spell "Merry Christmas".


Those are two of the projects that I have done from Pinterest. Stayed tuned for future crafting accomplishments.

Monday, December 5, 2011

Long Time No Blog

It has been a long, long, long, long, long time... LONG time... since I have blogged.

Lets recap the past year very quickly...

1) From October 2010 to October 2011, I was working as a receptionist at the office of a very good family friend. (A doctor's office). Which, BTW, is a big part of the reason I have not blogged in a long time because *here comes a list within a list*:
a) After being on a computer all day long, I did not want to come home and jump in front of another computer
b) Working at a doctor's office makes it very difficult to have anything to discuss on a blog; not because nothing happens, but because everything happens because of the patients which you cannot disclose anything about them. AT ALL. Therefore, any stories would sound like: "this one person said this one thing somewhere in the city of Tallahassee." Not very interesting.

2) In February, hubby and I enlarged our family by adopting a puppy! Brinkley is a German Shepherd. He is now 10 months old and about 90 lbs. Our friends tell us he can no longer be classified as a "puppy." In fact, one of our friends regularly refers to him as a moose. He is still my puppy though.


3) In June, we celebrate 1 wonderful year of marriage. We rented a condo on the beach and had a wonderful time... and that is all I can say.

4) In August, hubby graduated with his Masters in Applied Economics. He was very handsome in his cap, gown, and hood. And yes, he pulled the hood on top of his head to look like a grim reaper, but in gold. We followed this by a cruise to the Bahamas with my parents, his dad and stepmom, and my brother and his wife.

5) In October, hubby got a raise! Yay! And I resigned from my job to become a stay-at-home wife and have the opportunity to pursue my dream of teaching. The only flaw in this plan is how much I love being a stay-at-home wife. Fortunately, hubby is amazing and he only wants me to go back to work if I want to go back to work. Right now, I love being at home!

6) I have discovered Pinterest! I LOVE IT!! It gives me all sorts of ideas to satisfy my craft side, my loves to bake side, my desire to learn new recipes side, and my dream about my future home side... all in one amazing site! My next blog will be a couple of the projects from Pinterest that I have actually done along with pictures... I'm sure you can hardly wait!

So that is our life in the past year in a nutshell. Isn't life exciting?!?
Hubby and I at Tallahassee's Winter Festival